LMS Text Editor Tools For Accessibility
Accessibility tools in an Learning Management System (LMS) are a key tool to use when starting on any LMS. We will be looking at Moodle and the TinyMCE editor but you should find similar tools on other LMS text editors.
![]()
Formatting Tools
These are the tools you would use to format the text. These will be used to organize the text on the resources in the LMS. You can use these tools to implement Universal Design for Learning strategies and methods as well such as chunking and grouping, setting priority, and identifying the most important information.
Headers
To use headers in TinyMCE:
- Highlight the text you want to make a header.
- A menu appears above or below the highlighted selection.
- Select the header you want to use.

Header options start on heading 3 to match the site’s existing header structure.
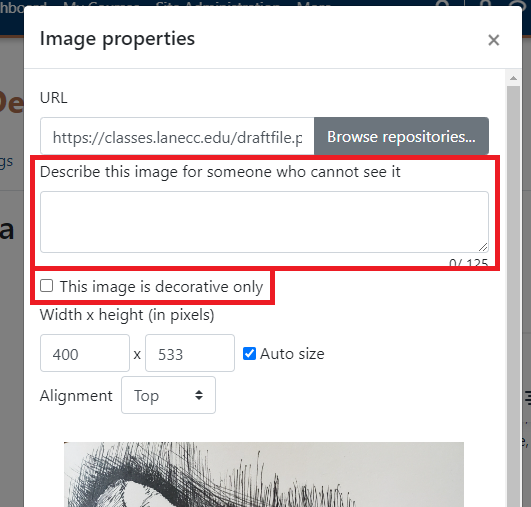
Alt Text
Alt text is applied while adding an image. It must be added or the image must be marked as decorative. If the image contributes to the learning, be sure to always add alt text.
List Formatting
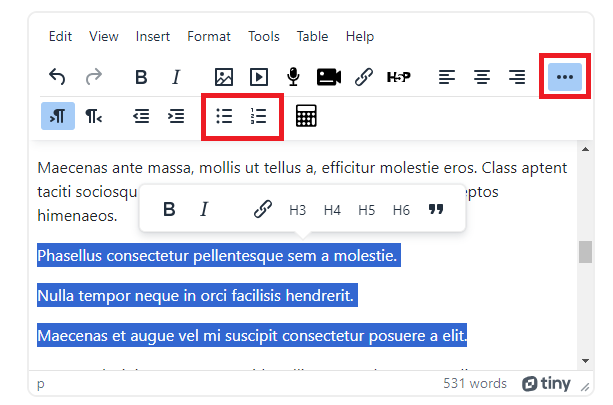
Format lists by:
- Click the three dot More button at the right side of the text editor.
- Highlight the lines of text to be made into a list.
- Select a bulleted list for unordered lists or numbered list for ordered lists.
Accessible Tables
Header Rows and Columns
You need to identify header rows and columns when using tables to do this follow these steps:
- Click into your header row.
- Click the Table menu at the top of the editor.
- Hover over Row and select Row Properties.
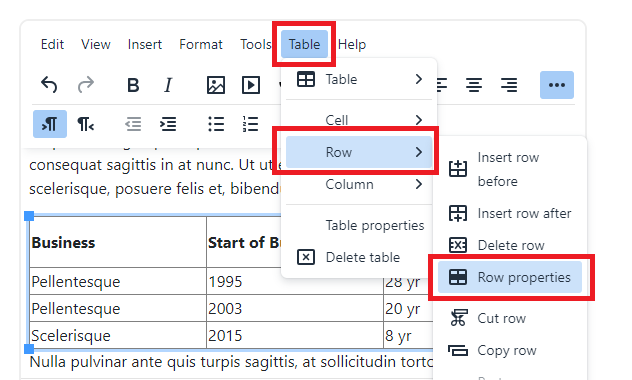
- Change Row type from “Body” to “Header”.
You would do the same to make a header column but hover over Column for step 3.
Table Captions
For complex tables add a caption to add more context for those using screen readers and speech-to-text. To add captions to a table:
- Click into the table.
- Click the Table menu at the top of the editor.
- Click Table Properties.
- Click the Show Caption checkbox.
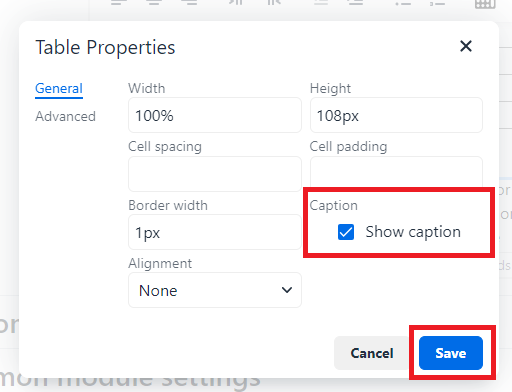
Add a caption in the text editor below the table describing the table key point.
Accessibility Checker
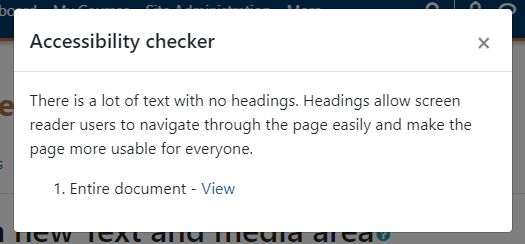
The Accessibility Checker tool that lets you check the accessibility of the content you are editing.
Accessibility checker
The accessibility checker in the TinyMCE text editor checks for the following:
- Alt text on images
- Font to background color contrast
- Long blocks of text are broken up under headings
- Tables with captions assigned
- Merge cells in tables
- Table with row or column headers.
This tool can be utilized by doing the following:
- Click Tools.
- Select Accessibility Checker
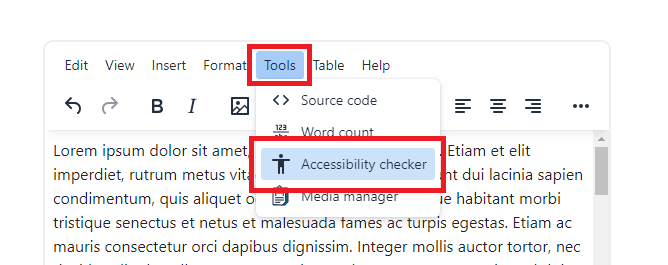
The checker will give a text explanation of fixes and where the issue is specifically or if it is the entire document.
