Activity Challenge: Creating Captions in YouTube
Summary
In this deeper dive activity, you will learn how to add closed captions to a pre-recorded video using YouTube's automatic captioning feature. This exercise should take approximately 20 minutes to complete.
NOTE: Though this exercise takes 20 minutes total, there is a time gap to ensure auto-captions are created by YouTube before you can access and edit.
Directions
First Step - Choose Video and Upload
Using the automatic captioning feature is a great first step to ensuring your closed captioning meets accessibility standards. Once YouTube creates the captions automatically, it is easy to update and refine for accuracy.
Step 1: Choose a video to caption
For the purposes of this activity, download this public domain video to use while navigating through this exercise.
Step 2: Upload the video to YouTube
- Open up a browser and go to http://google.com
- Log into your LCC Google account
- Go to YouTube.
- Upload the video to your LCC YouTube channel.
You can find the upload option in the top right-hand corner of your browser screen next to your user account icon.
![]()
A window pops up where you can drag and drop or select from your desktop the video you downloaded for this exercise, to upload to YouTube.
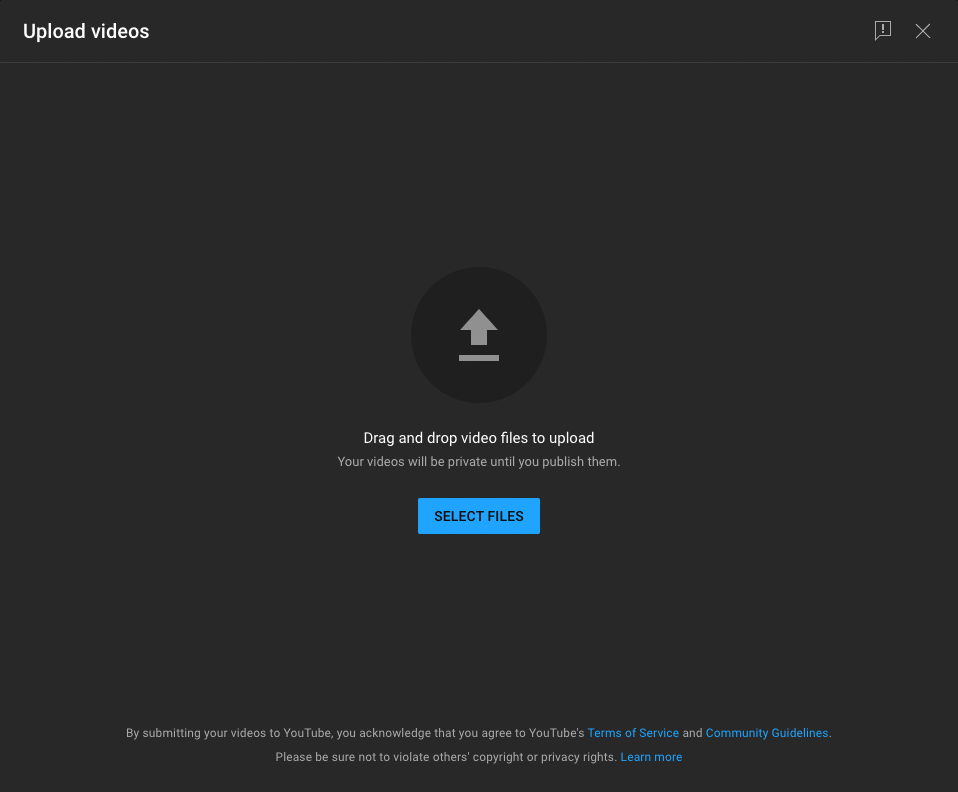
After your file is uploaded, a new window pops up while your video is uploading.
From here, you can add some descriptors. You can add an appropriate title and a description of your video.
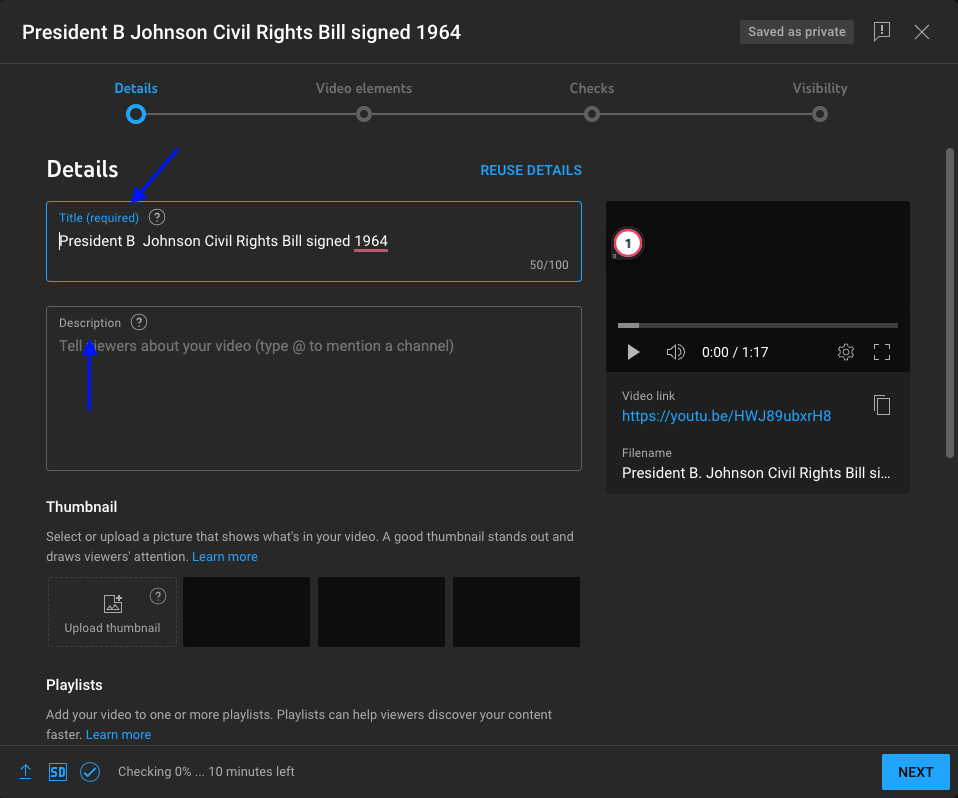
Once you have added your information, click the NEXT button at the bottom right-hand corner of that window to go to the next step.
This next window gives you three options for your video when publishing to YouTube. YouTube gives you descriptors of each choice so you can decide on the best option for you.
For this activity, choosing "private" is fine.
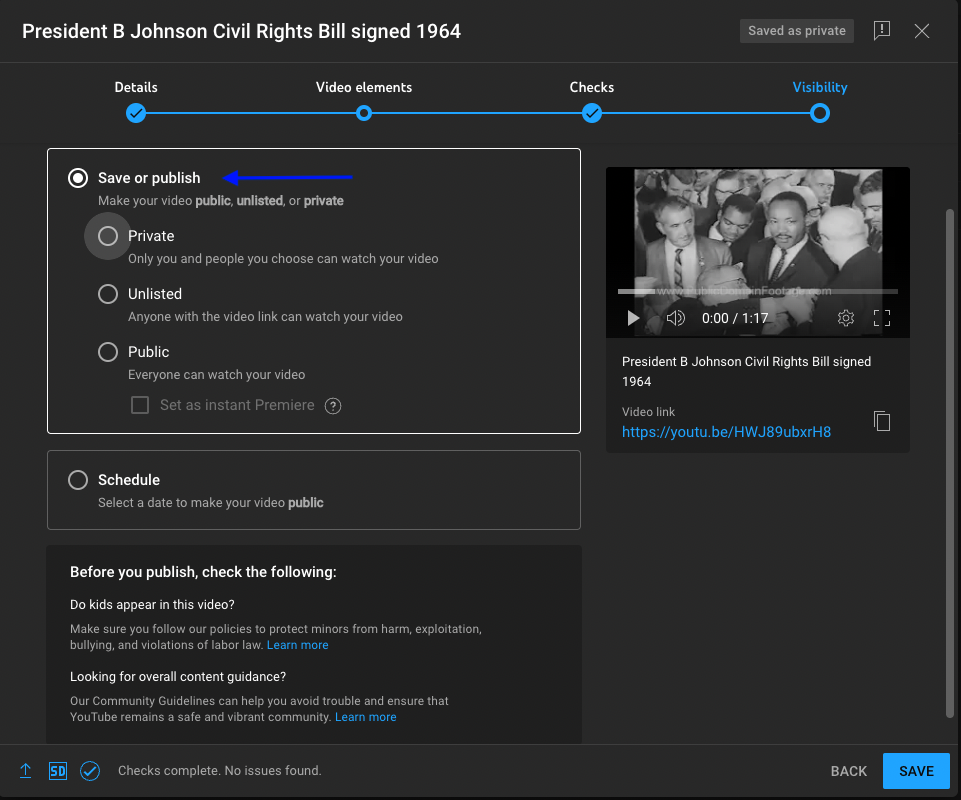
Once you are done, click the SAVE button so that all the information for this video is saved.
Once the video is uploaded, you will need to wait.
This is the time game mentioned above. YouTube needs time to process the video before you can edit the automatic closed captions created by YouTube.
NOTE: Depending on the time of day, users on the website, and how many are uploading to the server, having captions created by YouTube can take a few minutes to a few hours.
Second Step - Add/Edit Captions on YouTube
Step 1: YouTube's Automatic Captions
The easiest way to create captions is to let YouTube first create them automatically. This can save you a great deal of time.
NOTE: If you just leave it at this stage is not considered fully accessible. This is due to the YouTube algorithm, which does not always process the content exactly as spoken.
To check if YouTube has uploaded and rendered automatic captions, you will need to navigate to your YouTube Studio.
- From the main YouTube home screen.
- Go to the right-hand menu.
- Choose Your Videos.
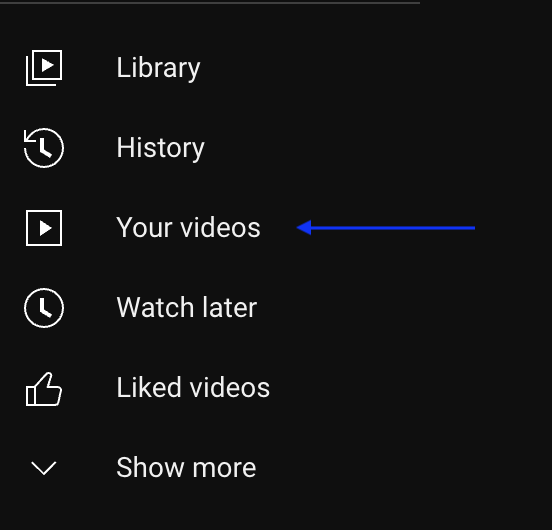
The screen that pops up will show you a list of all your videos uploaded to the platform. Navigate to the video you just uploaded and click on it.

A new window pops up. Here you have the same options as before with a few exceptions.
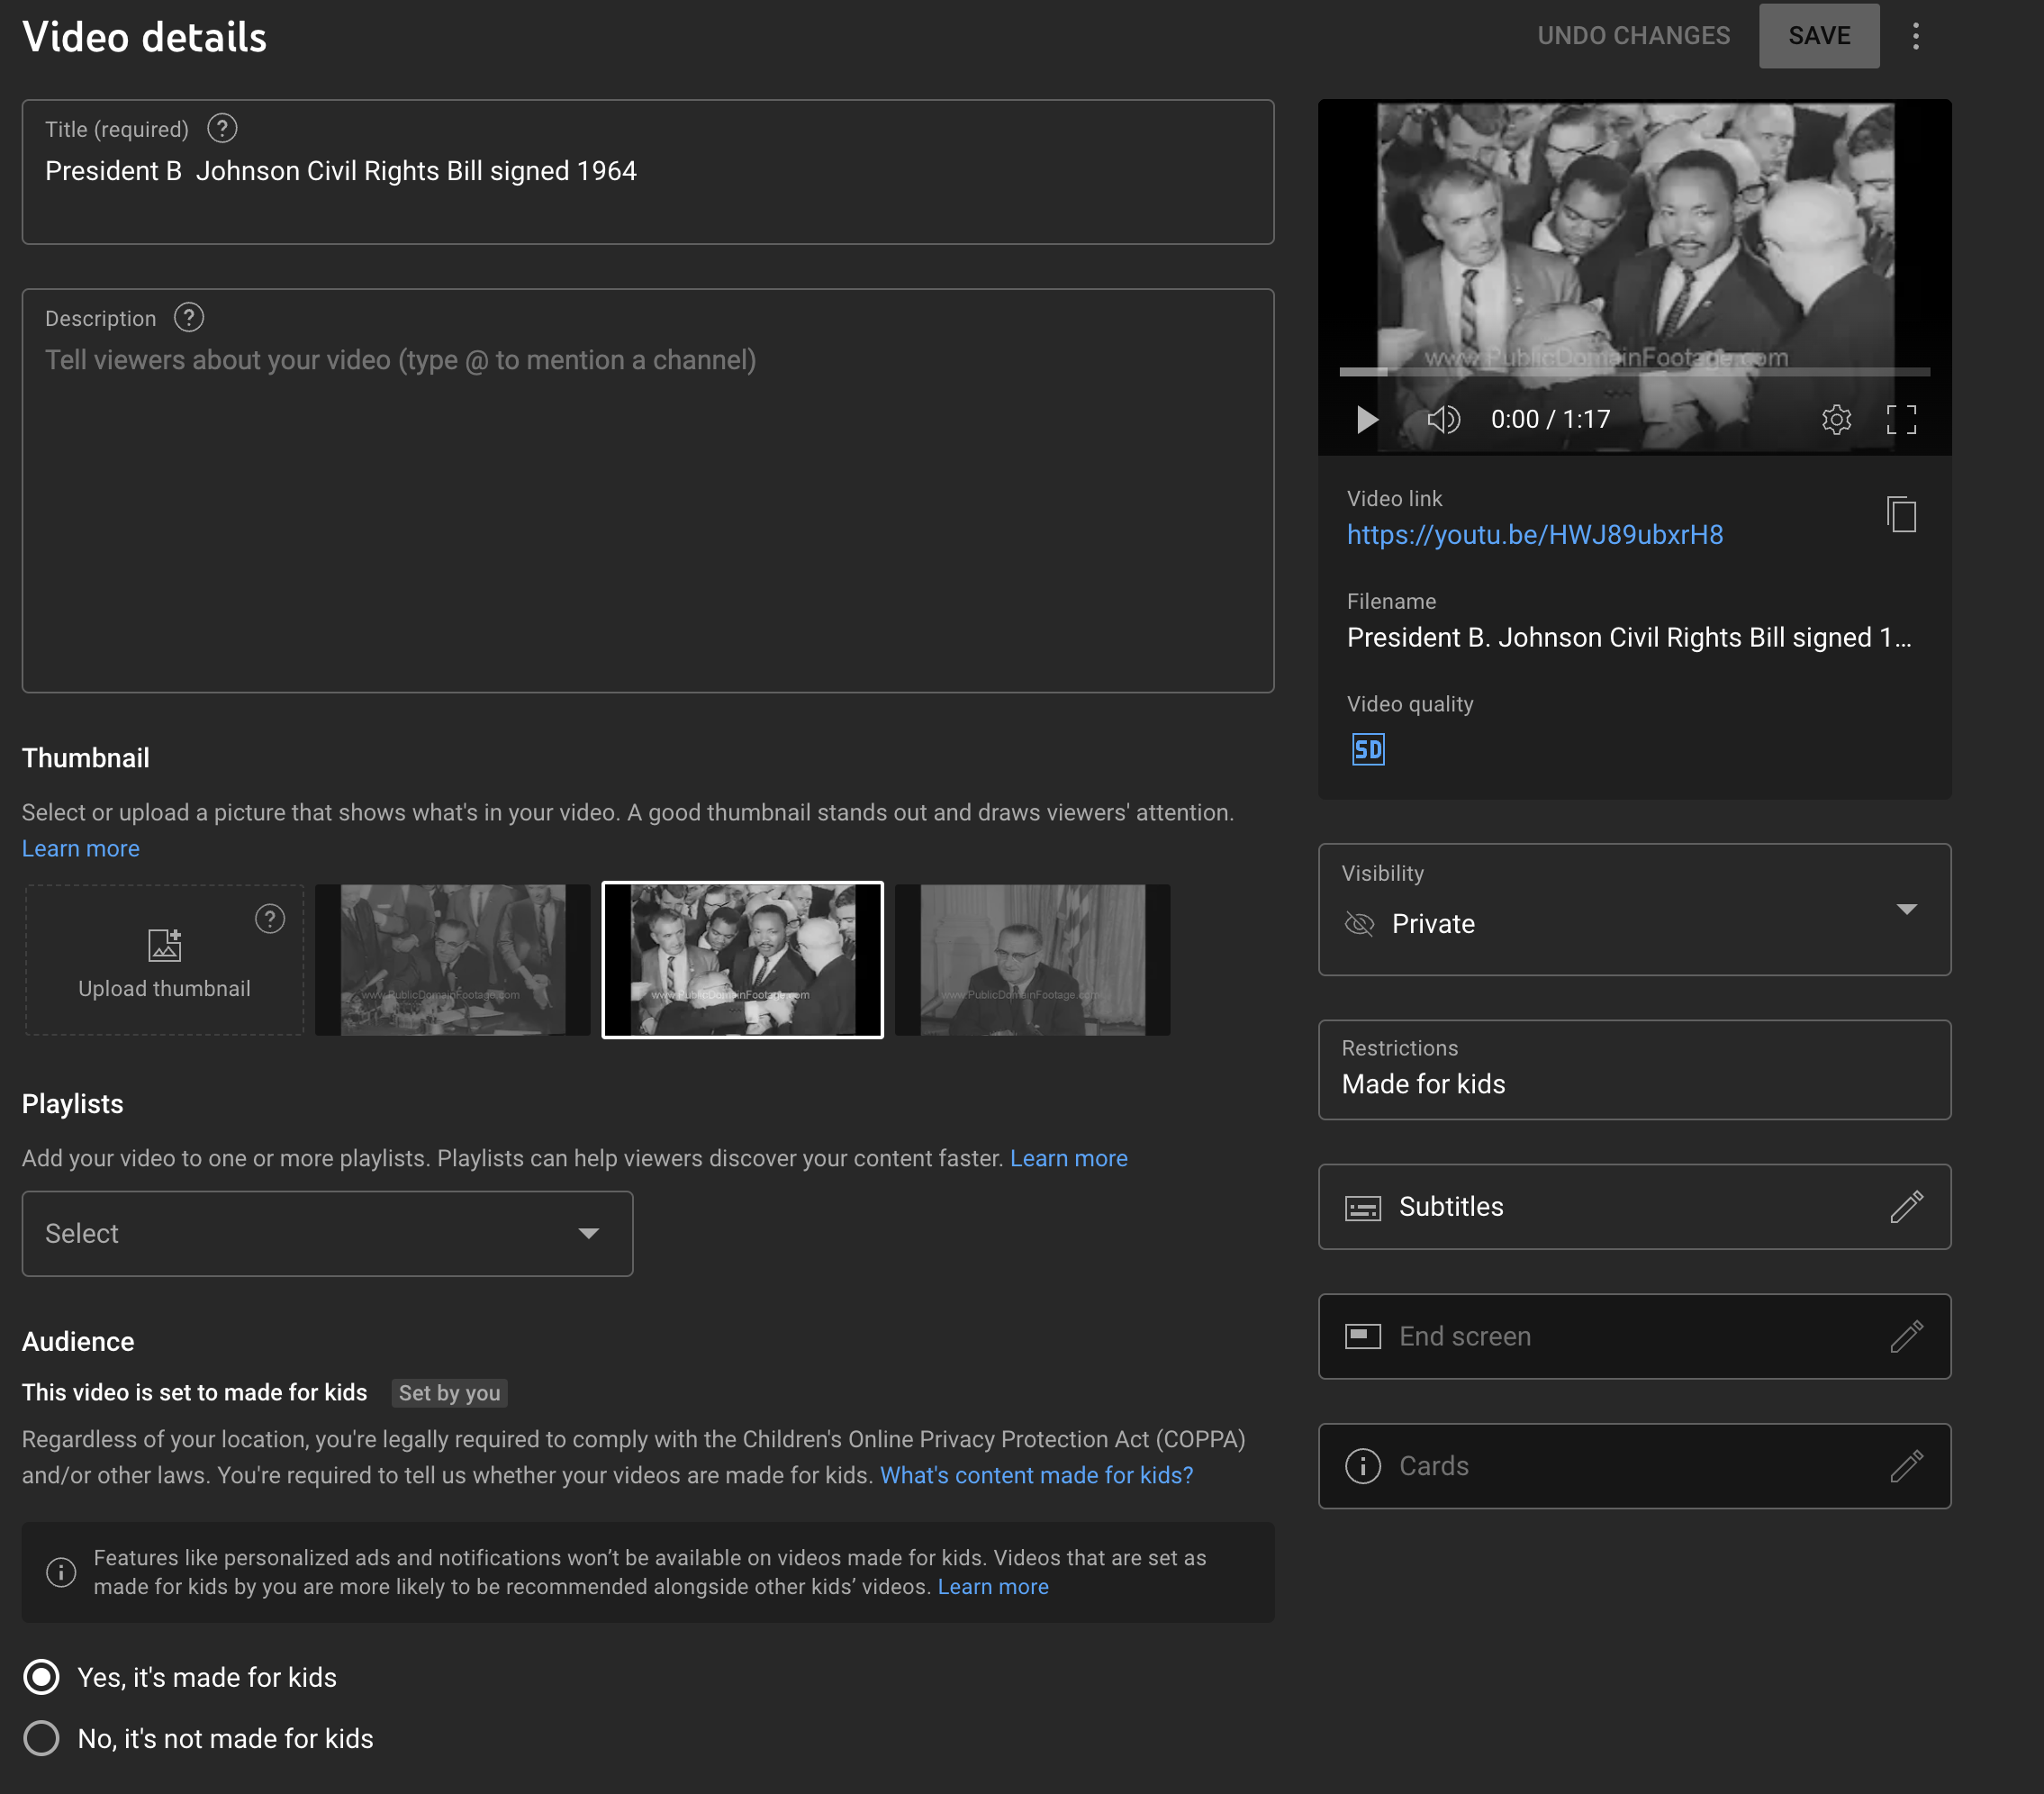
Underneath the video thumbnail, there will be a subtitle button.

Click that button to take you to the captions editing window.
If YouTube has created automatic closed captions, you will see them in the EDIT TIMINGS content box. The example below shows that YouTube has created automatic captions that can now be edited.
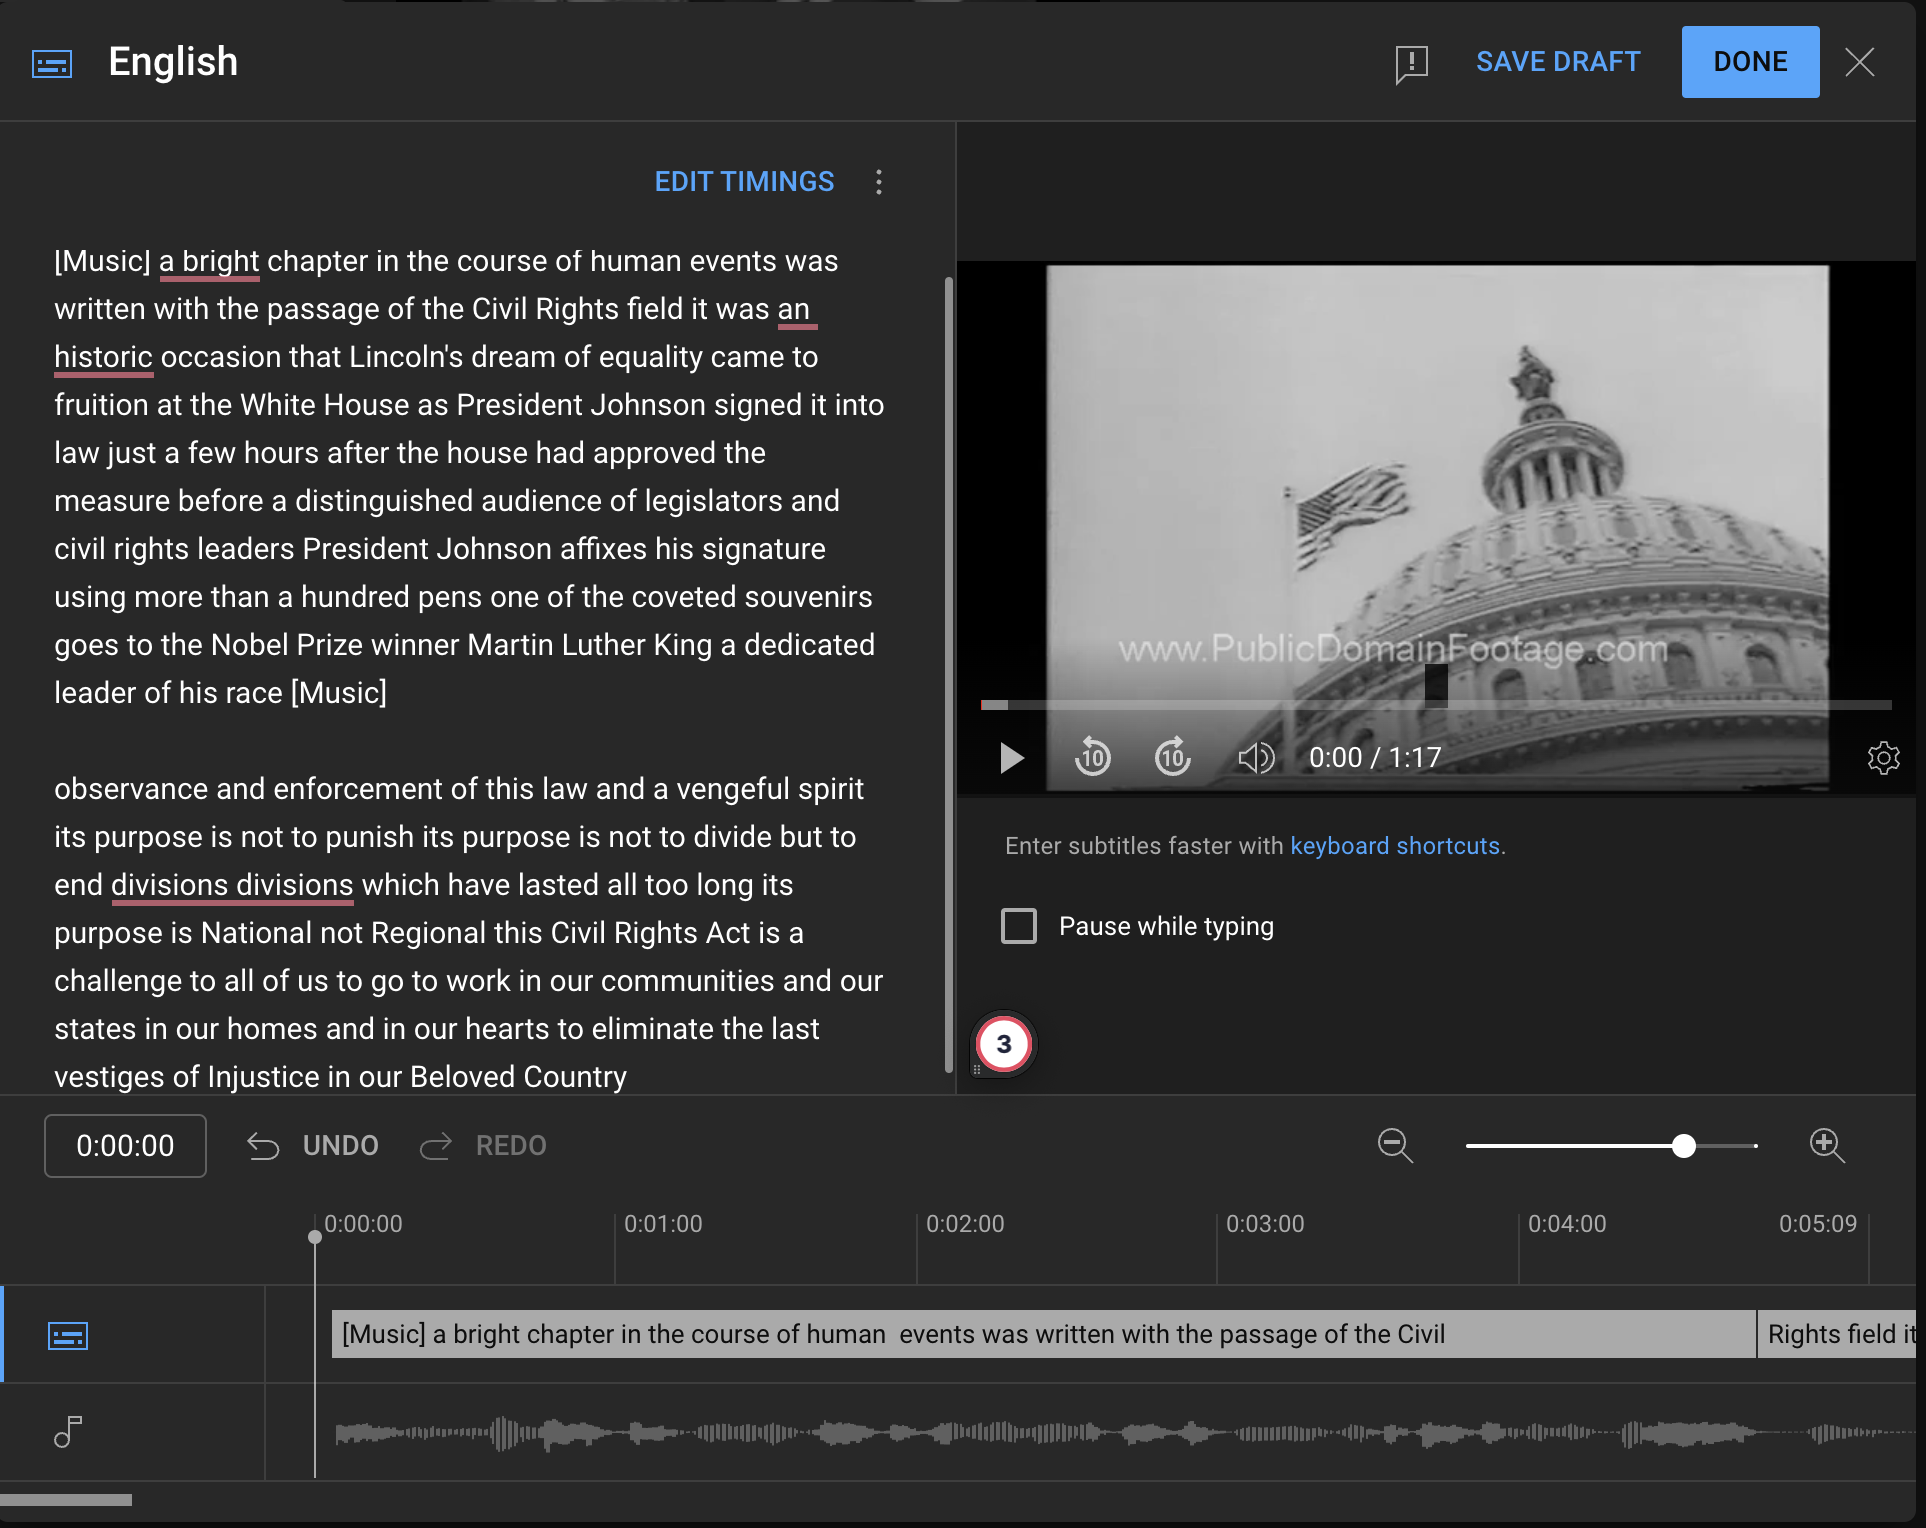
If the captions are not there, you will have options displayed in that area that include adding captions manually. That is an option or you can wait.
YouTube may need more time OR in some cases, may only give you partial captions and then you can add the rest.
- If you choose to wait for YouTube to create the captions, then at this point - stop.
- Come back later to check. When you see captions created in that space, you can continue.
Step 2: Review and edit the captions
YouTube's automatic captioning feature is not perfect, so you will need to review and edit the captions to ensure that they are accurate.
NOTE: You have two options to edit your captions.
- EDIT AS TEXT: This is the view you see first, and is what you see in the video example below. It is just a text box where you can make your changes as you follow along with the video.
- EDIT TIMINGS: When click "EDIT TIMINGS" it will change to a breakdown of captions synced to when the spoken word happens in the video.
The following video demonstrates how to edit the transcript within the "Edit as Text" window within the YouTube Video upload window. The text is displayed on the left side of the window and the video you upload is on the right. There is no audio in this 35-second video. This video only shows the computer cursor clicking on the text to be edited.
Example using EDIT TIMINGS
If you are in the "Edit as Text" window and click the "EDIT TIMINGS" at the top right of the text window, it will change to the transcript parsed out by time. As shown in the image below, the timings of the transcript are circled in blue (on the left) and the video is on the right. Very similar to editing as text, but this is a great way to see how the transcript lines up with your video.
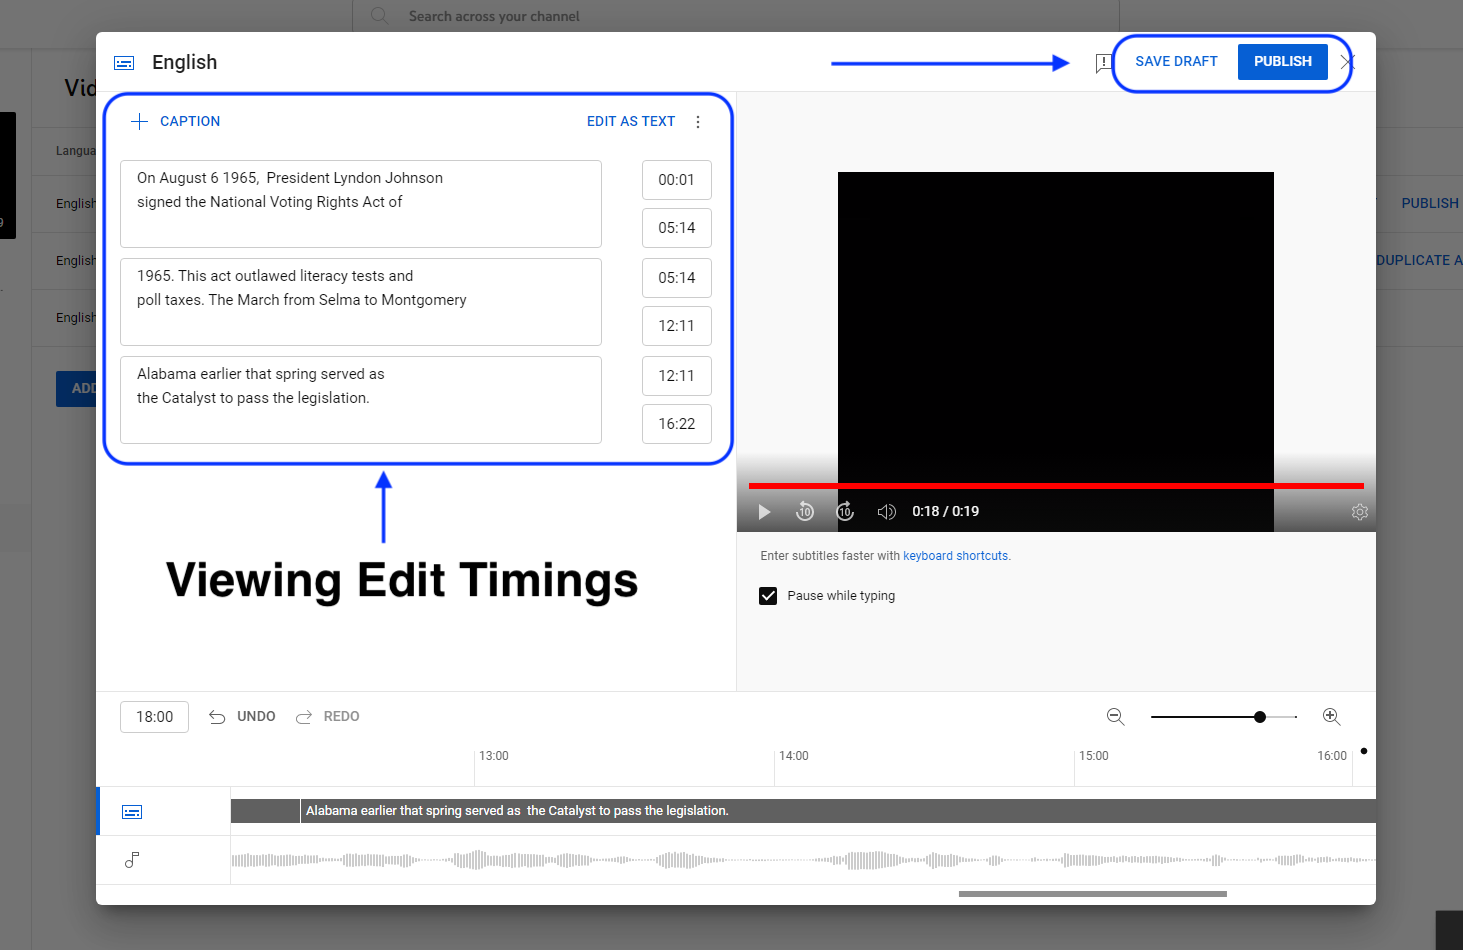
Choose which way you want to edit your captions then do the following:
- Play your video by clicking on the play icon under the video thumbnail.
- As the video plays, read through the captions.
- If you hear something that is not conveyed correctly in the text, make the necessary edits in the edit box.
- If the captions created by YouTube are accurate that is terrific! You should still check spelling and grammar.
- Capital letters at the beginning of sentences.
- Periods at the end of sentences.
- Commas where applicable.
Step 3: Publish the captions
Once you have reviewed and edited the captions, depending on what window you are in you will have a choice to click "DONE", "SAVE DRAFT", or "PUBLISH".
Your video now has accurate closed captions, making it accessible to a wider audience.
Congratulations on completing the deeper dive challenge!
Closed captions are an essential tool for making videos accessible to all individuals, regardless of their hearing abilities or language preferences. By taking the time to learn how to add closed captions to your videos, you are helping to create a more inclusive and accessible online learning environment.
Step 4: Share your link
- Copy a sharable link of your captioned video by viewing it on YouTube outside of your account settings.
- On the main site, click "Your Videos" (just like you did before)
- Hover over the video you want to share and some icons will show up.
- One will be "View on YouTube" - click that option. The silent 13-second video below demonstrates this. The icon you choose will look like a TV screen with a right-pointing chevron that means "play".
- A YouTube page will populate with your video. Select the SHARE option under the video.
- Copy the link.
- Click the submission button at the bottom of this activity.
- Paste the link in the text box.
- Submit the activity to enter your name in the raffle.
